

Install WebsiteChat on WordPress, Shopify, Studio, Wix, and Jimdo
WebsiteChat does not use a different AI integration for each website builder. You embed the same widget snippet.
Platforms differ in where that snippet goes and how you publish afterward.
For crawl, testing, and configuration, read the full WebsiteChat setup guide.
Copy the WebsiteChat widget code
In the console, open Chatbot → Install and copy the snippet. The rest of this page only covers where to paste it.
<script src="https://websitechat.ai/widget.js" data-site="YOUR_SITE_KEY"></script>
Replace YOUR_SITE_KEY with the value shown for that site. Do not reuse a key from another install.
How to Install WebsiteChat on WordPress
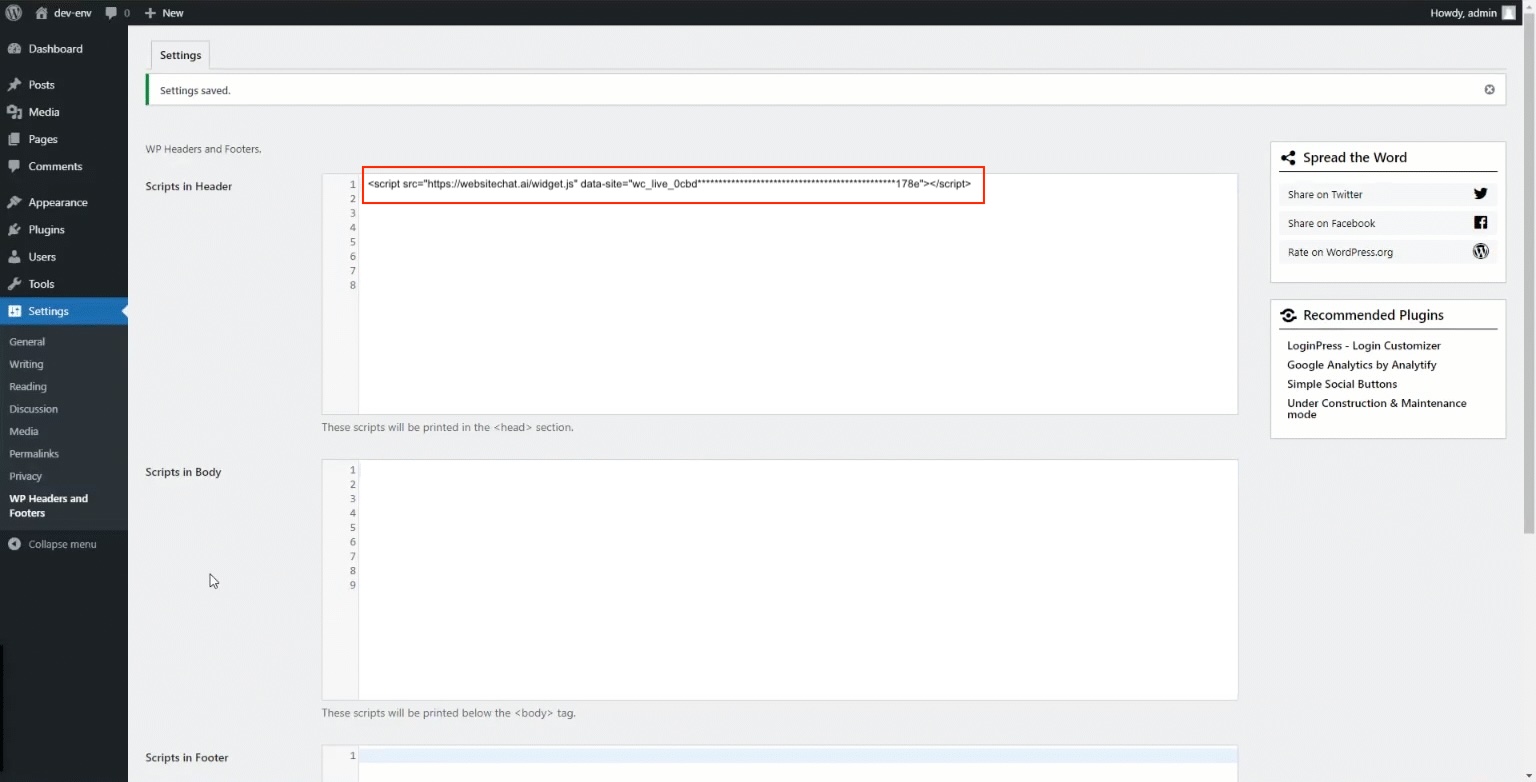
A dedicated WebsiteChat plugin is not required. Install the widget snippet with WP Headers and Footers, then paste it into Scripts in Header so it prints in the <head> on every public page.
- Open WordPress Admin and install the WP Headers and Footers plugin if it is not already installed
- Go to Settings → WP Headers and Footers
- Paste the WebsiteChat widget snippet into Scripts in Header
- Save the settings
- Clear cache if a cache plugin is active
- Check the live site
Do not use Scripts in Body for this snippet. The field note on that screen says header scripts are printed in the <head> section.
If the widget is missing after save, confirm the snippet is complete, then check cache, CDN, and any security or script-optimization plugins.
How to Install WebsiteChat on Shopify
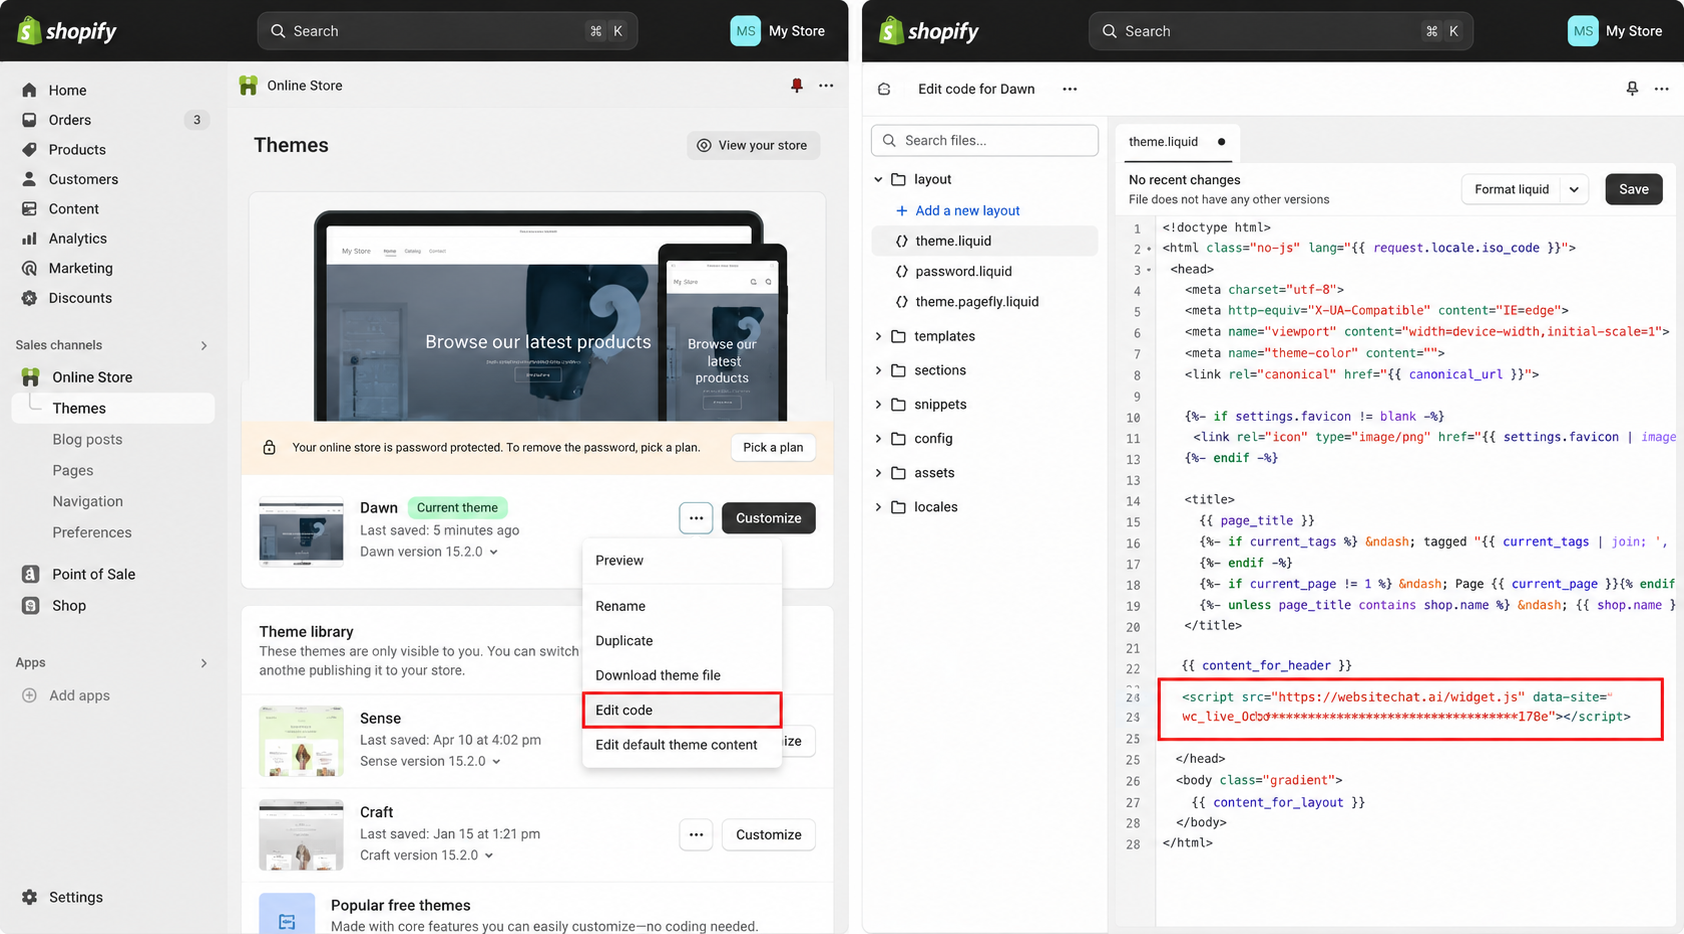
Add the snippet in a theme location that loads on the storefront, not on a single product template.
- Open Shopify Admin
- Go to Online Store → Themes
- Open theme code or another global theme area that all pages share
- Paste the WebsiteChat snippet
- Save
- Verify on the published storefront
After you switch themes, check that the snippet is still present. The theme editor preview is not enough.
How to Install WebsiteChat on Studio
WebsiteChat indexes the published Studio site. Unpublished editor content is not crawled until you publish it.
- Open the Studio site
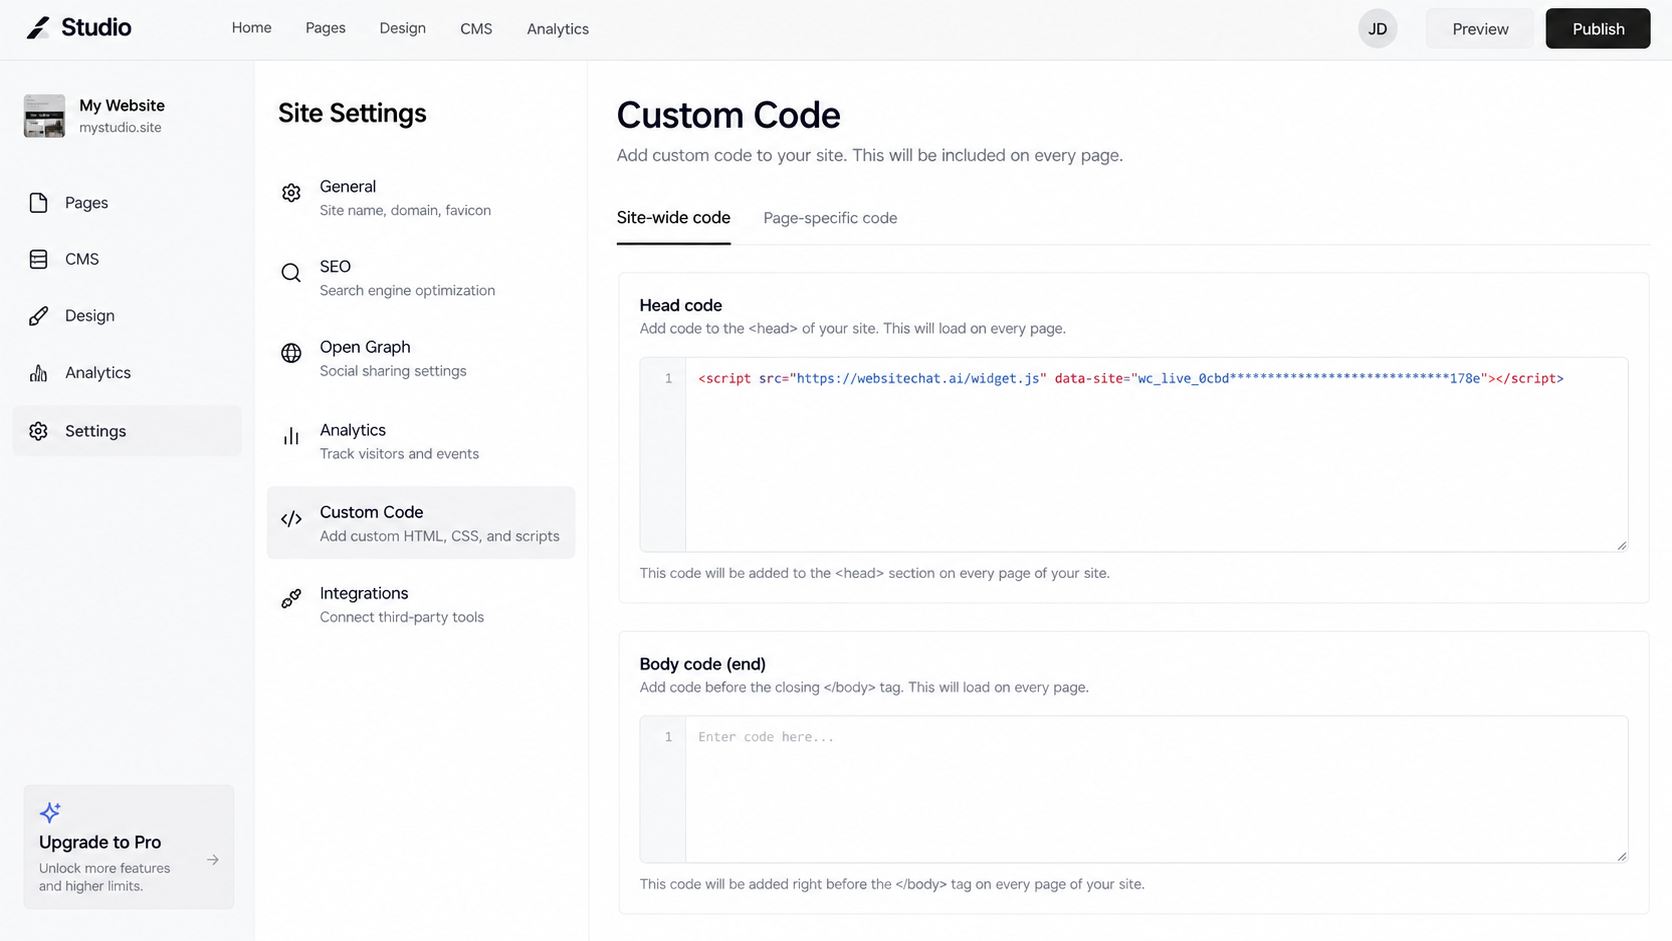
- Open Site Settings
- Open Custom Code (site-wide)
- Paste the WebsiteChat snippet
- Publish
- Check the public URL
Custom Code availability can depend on the Studio plan. If the field is missing, check the site’s plan and settings in Studio before changing WebsiteChat.
How to Install WebsiteChat on Wix
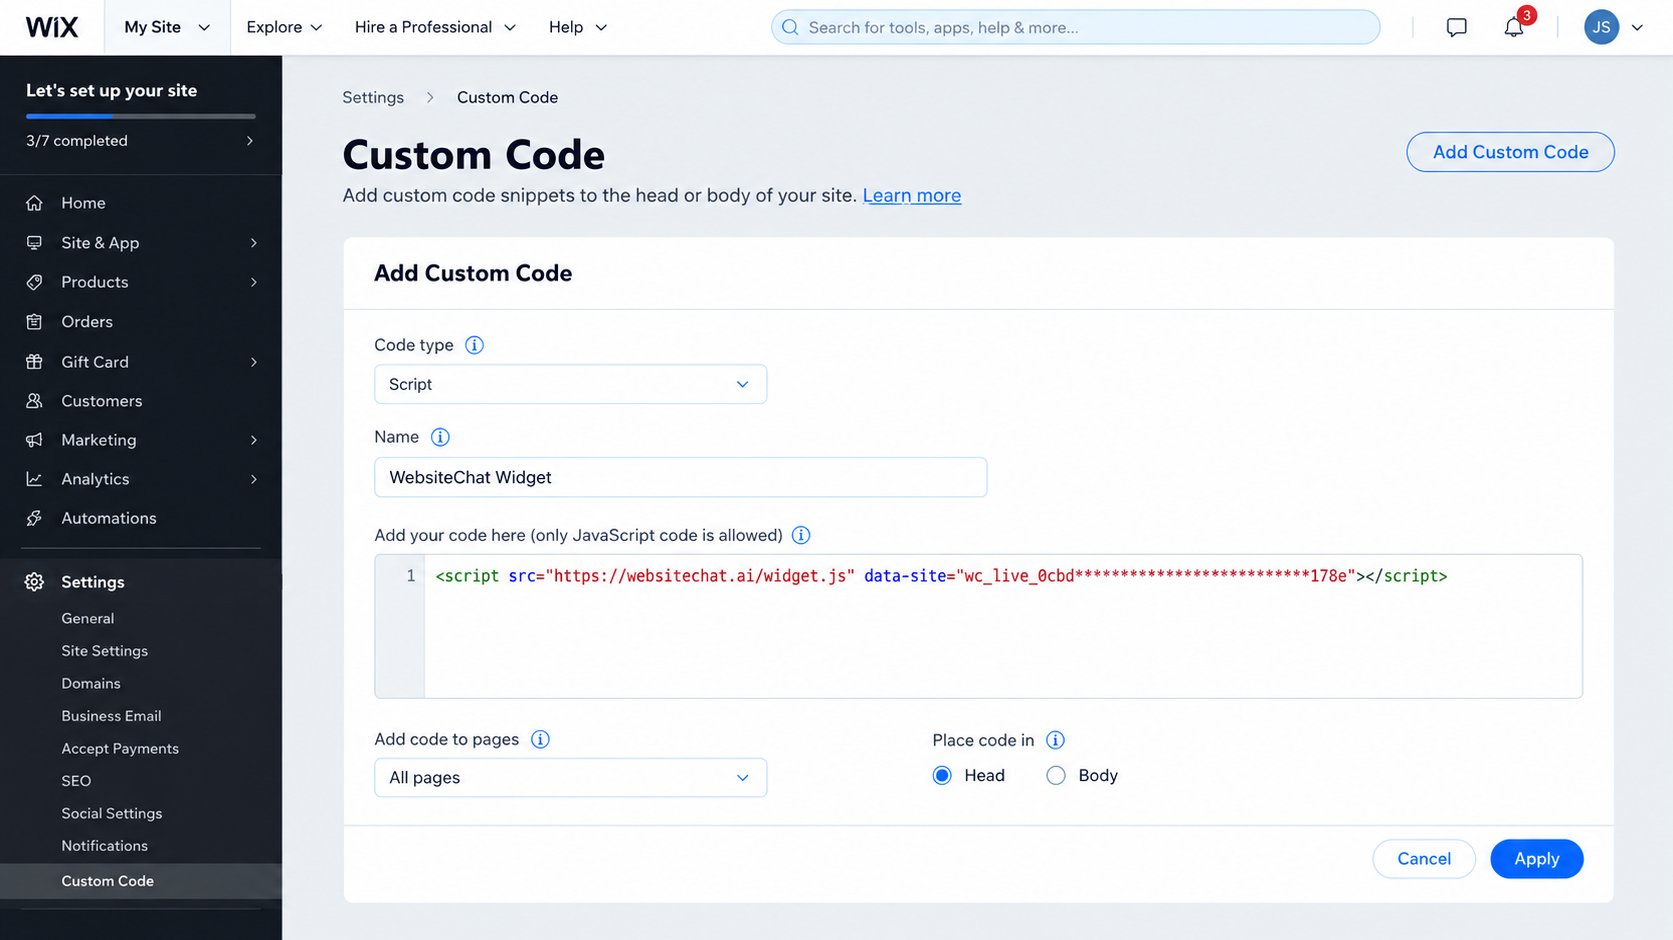
Use Custom Code in the Wix dashboard, and apply it to all pages. If you manage several Wix sites, confirm you are editing the live one.
- Open the Wix dashboard
- Open Custom Code
- Add custom code and paste the WebsiteChat snippet
- Set the scope to All Pages
- Save and publish
- Check desktop and mobile on the live site
A “selected pages” scope will hide the widget on everything else.
How to Install WebsiteChat on Jimdo
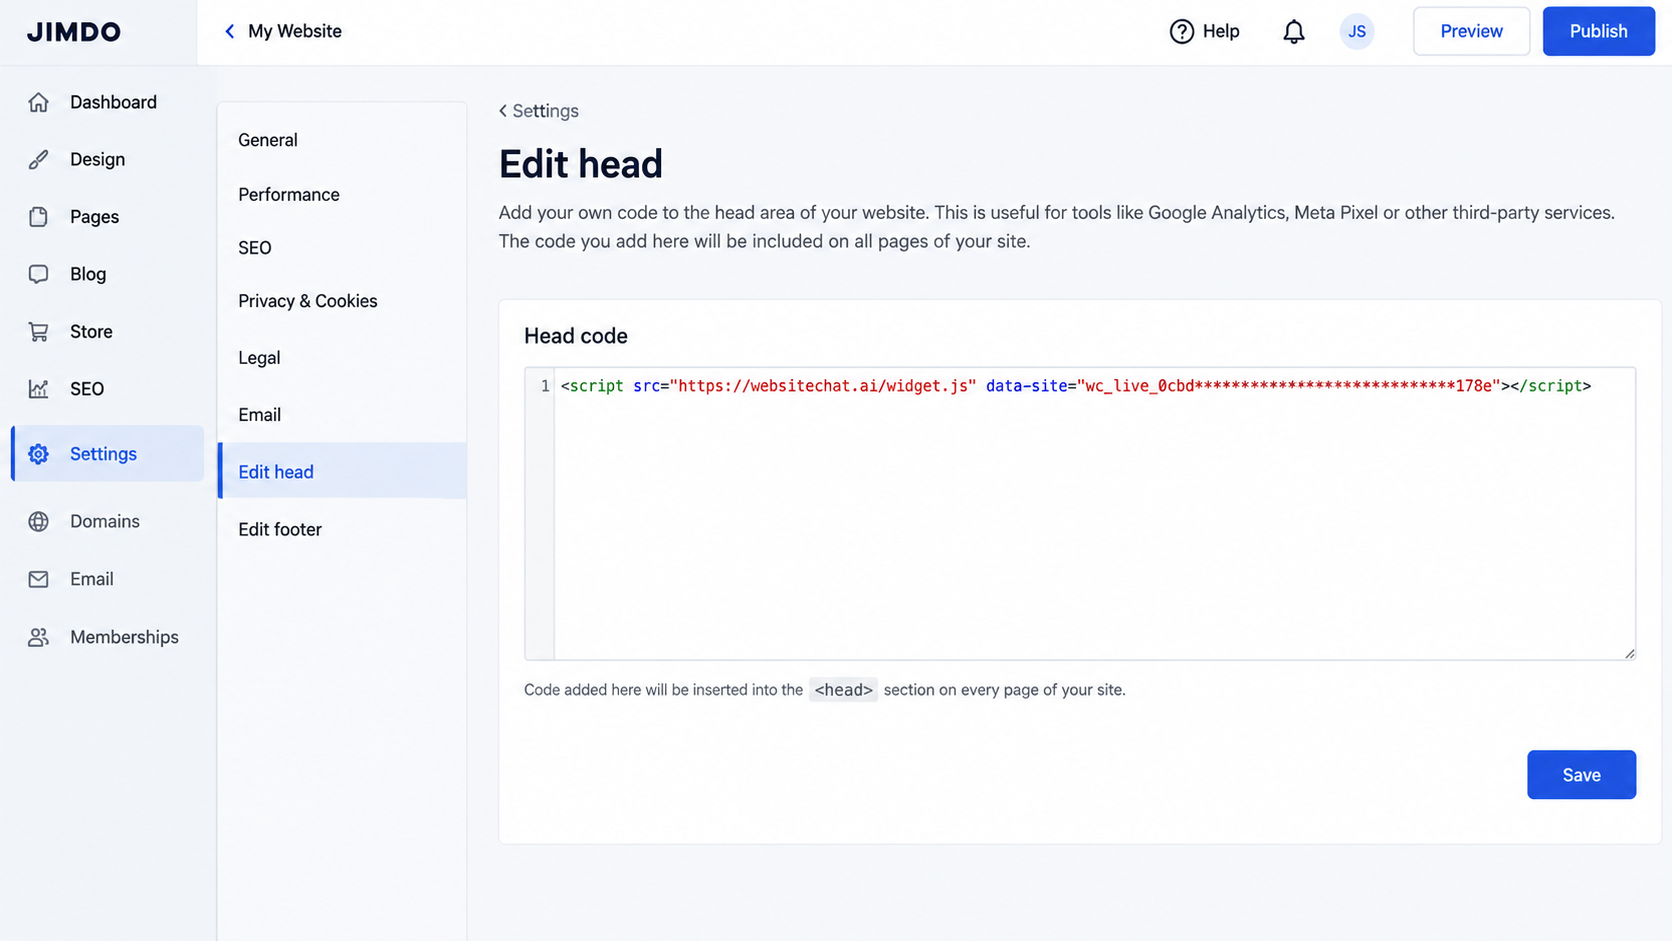
Jimdo Creator supports custom HTML and JavaScript. For a site-wide WebsiteChat installation, use Edit Head.
- Open Jimdo Creator
- Go to Menu → Settings → Edit Head
- Paste the WebsiteChat widget snippet
- Save the changes
- Check the public site
Jimdo products use different editors and features. If your Jimdo site does not provide Edit Head or another way to add site-wide JavaScript, this installation method is not available for that site.
Verify WebsiteChat after installation
- Homepage
- Inner pages
- Desktop
- Mobile
- The widget opens
- A test question returns a reply
- A public, logged-out browser
For crawl results and answer quality, use the WebsiteChat setup guide.
How to Remove WebsiteChat
Delete the same snippet from the platform’s global code field. Save or publish, clear cache if needed, and confirm the launcher is gone on the live site.
Removing the front-end snippet does not delete crawled knowledge in WebsiteChat. Disable or remove the site in the console if you need that as well.